Managing challenges for CTFs can be an ordeal.
Our hosted challenge platform makes it easy to
automatically deploy and manage challenges with
technologies you're already familiar with.
ctfcli
turns the current folder into a CTF event git repo.
This will create the
.ctf folder
with the
config file
that will specify the URL, access token, and keep a record of all
challenges dedicated for this event.
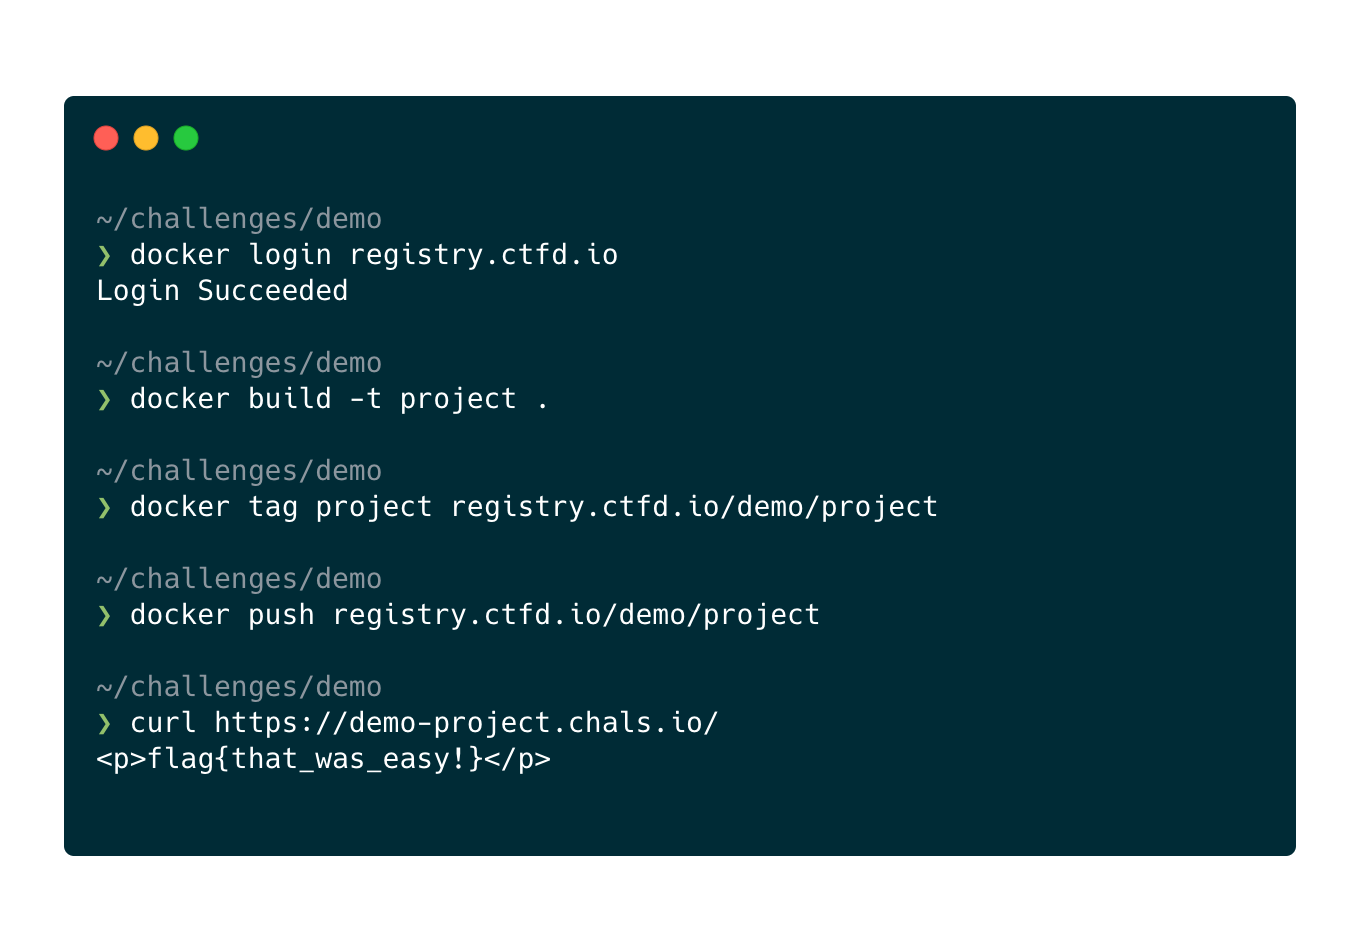
# app.py
from flask import Flask

app = Flask(__name__)

@app.route("/")
def flag():
    return "<p>flag{that_was_easy!}</p>"
# challenge.yml
name: "Webserver"
author: "unknown"
category: web
description: "Can you find the flag on the webserver?"
value: 500
image: .
flags:
- "flag{that_was_easy!}"# Dockerfile
FROM python:3
RUN pip install flask
COPY app.py .
EXPOSE 5000
CMD flask run --host=0.0.0.0Events are made of challenges.
ctfcli
provides a
challenge specification
(challenge.yml).
In addition you can provide a Dockerfile that builds your challenge server.
Every challenge processed by
ctfcli
should have a
challenge.yml
file at its root.
Add a challenge from a local
folder or pull one in from another repository - a reference is
kept in your
.ctf/config
file.
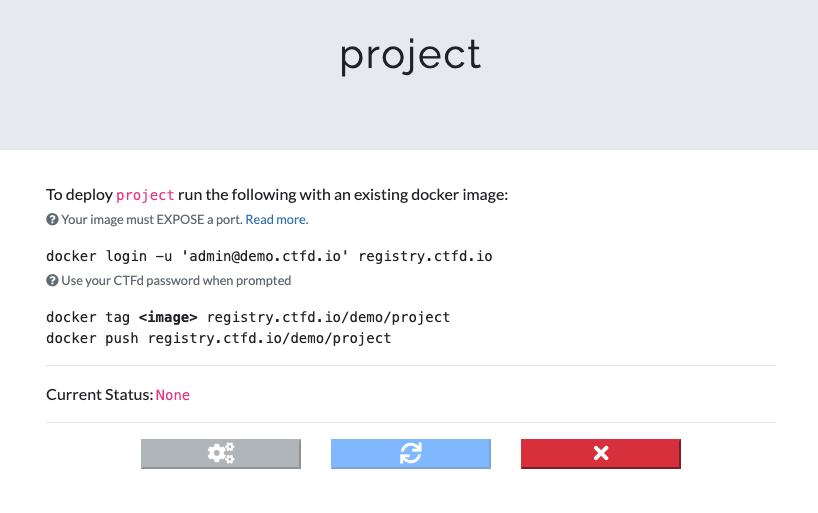
Installing a challenge automatically creates it in your CTFd instance using the API.
Once installed, you can run the
ctf challenge deploy
command to deploy your Dockerfile.
ctfcli will build, push, and deploy the challenge server.
The challenge will go from
building
to
built to
deployed
until finally your challenge will automatically be given a URL to access.
For challenges that need a TCP port one can be automatically assigned through the protocol field of challenge.yml.
Or a port can be assigned manually. Read about Requesting a TCP Port
Whenever you make changes to
challenge.yml,
sync them to your instance the same way:
docker push.
Made with ❤️ in New York City